Wednesday, October 5, 2016

How to Bake: Cinnamon-Apple Cupcakes

If you've read my latest baking post, you will know that I've fallen head over heels for cupcakes. I used to be more of a cake or muffin kinda girl, mostly because those are easier to make and don't leave the kitchen looking like too big of a mess. However, ever since I've baked my first cupcakes I've been craving new ones constantly, which means that I've been baking them pretty much at least once a week.

Now that we're well into fall, I wanted to try out a new recipe that goes perfectly with the new season as it uses both apples and cinnamon - two of the things I immediately associate with fall.
Even though I had never tried this recipe out previous to this attempt, the cakes still turned out amazing - so they're both super easy to make and extremly yummy!


To make these, you will need:

Cupcakes: (12)

- 120g soft butter
- 120g sugar
-120g flour
- 2 large eggs
- 1 teaspoon cinammon
- 2 apples


Frosting:

- 100g cream cheese
- 60g soft butter
- 1 teaspoon cinammon
250g powdered sugar
- 1 apple


Method:

1) Preheat the oven to 170 degrees celsius. Mix butter and sugar until the mixture appears to be soft, then add eggs, flour and cinammon and mix until everything is well-combined.

2) Peel, quarter and core the apples, then cut them into small squares. Add the apple squares to the mixture and mix for another minute.

3) Add your mixture into twelve muffin tins evenly and bake the cakes for around 25 minutes.

4) To make the frosting, combine the cream cheese and butter. When the mixture is soft, continue to add cinammon and powdered sugar and mix until well-combined. Fill your frosting into a piping bag and add it onto your cupcakes.

5) Cut the leftover apple into small slices and place them on top of the forsting. And you're done!


Do you have any favorite fall recipes, baking-related or not? If so, please feel free to share them with me!

If you liked this post and want to be updated on fresh content regularly, why not follow me on Bloglovin'? You can find me on TwitterPinterest and Instagram as well!
SHARE:

Tuesday, September 13, 2016

How to Bake Lemon-Chocolate Cupcakes

 Baking is one of my favorite pastimes, but I did very little of it during the winter because no one in my family likes to eat a lot of sweets when it's so hot and it'd be a waste to throw all that good food away.

However, yesterday was my last day of freedom, aka the last day before senior year started, and because of that, I decided to do some celebratory backing. I wanted to try something I hadn't done before, and when I came across this lovely recipe on Pinterest, I decided to tinker with it - and what came to be were these lemon-chocolate cupcakes! They're both sweet and a little sour, they're the ebst of both worlds y'all.

When I asked you guys on Twitter whether I should share the recipe on here, the responses were utterly positive, so here we go!


To make these, you will need:

Cupcakes:
- 2 large eggs
-200g flour
- 115g caster sugar
-115g non-salted butter
- 100ml lemon juice, preferably freshly pressed
- zest of 2 lemmons
- 1/2 baking powder

Buttercream:
- 115g Butter
-175g icing sugar, sifted
- 1/2 tablespoon cacao powder

Decoration:
- 10 Raspberries
- Sprinkles

Method:

Cupcakes

1) To make your cupcakes, place all of the ingredients but the lemon juice into a mixing bowl and whisk for around two minutes so you'll have a well combined, smooth mixture.
2) Now, add the lemon juice to your cupcake mixture. Then whisk for another minute.
3) Place an even amount of your mixture into 10 cases.
4) Bake on the middle shelf of a preheated oven 190 c (170 c fan) for twenty minutes - once that time is over, use a coctail stick to check whether your cakes are done - stick it into a cupcake, if some dough sticks to it when you pull it out, then your cakes aren't done yet!

Buttercream

1) Whisk 115g of butter until it's very fluffy - the amount of time depends on how fast your whisk can go, really, and whether the butter is room temperature or was previously forzen - then add 175g of icing sugar into the same bowl.
2) Once your cupcakes have cooled down, you can pipe the buttercream onto them using a piping bag.
3) To give your cupcakes the final touch, place a raspberry on top of each cake and then dapple them with sprinkles - done!


If you liked this post and want to be updated on fresh content regularly, why not follow me on Bloglovin'?
You can find me on TwitterPinterest and Instagram as well!
SHARE:

Sunday, March 27, 2016

Milka Easter Cupcakes | Lifestyle

Happy Easter you guys!

I love myself some baking, I always have, so I usually like to whack out something special once holiday seasons roll around. When I was brainstorming for what I could try out for my family's annual Easter bash, I stumbled upon Lauren's recipe for cupcakes - Lauren, for those of you that don't know, is an insanely gifted baker whose creations make me swoon regularly.

Because I loved the look of her cupcakes so much, I based mine on them - I tinkled around a little and added some personal touches here and there, and boom, the Milka Easter Cupcakes were born!
The response to the picture I posted of them on Twitter was so huge that I decided to share the recipe even though it's technically Easter Sunday already - hey, maybe you could use up your leftover Easter eggs to make these?


To make these, you will need:

Cupcakes:
- 2 large eggs
-115g flour
- 115g caster sugar
-115g non-salted butter
- 2 teaspoons cocoa powder
- 1/2 baking powder
- 2 Milka Mini Eggs (I used the 'Confetti' ones)

Buttercream:
- 115g Butter
-175g icing sugar, sifted
- 50g melted Milka chocolate

Decoration:
- 10 Milka Mini Eggs (I used the 'Confetti ' ones)


Method:

Cupcakes

1) To make your cupcakes, place all of the ingredients but the chocolate eggs into a mixing bowl and whisk for around two minutes so you'll have a well combined, smooth mixture.
2) Now, chop the two chocolate eggs into small pieces and add them to your cupcake mixture. Then whisk for another minute.
3) Place an even amount of your mixture into 10 cupcake cases.
4) Bake on the middle shelf of a preheated oven 190 c/170 c fan for twenty minutes - once that time is over, use a coctail stick to check whether your cakes are done - stick it into a cupcake, if some dough sticks to the stick when you pull it out, then your cakes aren't done yet!

Buttercream

1) Whisk 115g of butter until it's very fluffy - the amount of time depends on how fast your whisk can go, really - then add 175g of icing sugar into the same bowl.
2) Following that, add your melted chocolate into the bowl and whisk for another two to three minutes.
3) Once your cupcakes have cooled down, you can pipe the buttercream onto them using a piping bag.
4) To finish the look of your cupcakes off, now slice your remaining chocolate eggs into two halves - you might want to heat your knife up using hot water before doing this so the eggs won't curmble in the process - and add two each to the top of your cakes.


And that's it! These are actually very easy to make, and for the most part very fuss-free - and they're super delicious as well, especially if you love chocolate as much as I do!


Do you like baking? If so, did you bake anything special for the holidays?
SHARE:

Wednesday, March 23, 2016

A Healthy Pancakes Recipe | Lifestyle


I've been trying to eat healthier during the past couple weeks, especially because I've been dealing with a lot of outbreaks and general redness of my skin.
But, me being, I obviously didn't want to give up on some of my favorite foods completely, so I've been experimenting while cooking a lot and I feel like I've come up with the perfect recipe for a healthier version of my favorite pancakes.

I asked on Twitter whether anyone was interested in me sharing that recipe on my blog, and because the response was so positive, here I am!

To serve four people, you will need these ingredients:

- 4 big eggs
- 400ml/13 fl. oz. of (lactose) free milk - lactose free is optional, but as milk makes me feel bloated I like using it
- 100ml/ 3 fl. oz water
- 400g/ 14 ounce of flour
- 100g/ 3,5 ounce of sugar
- one packet of vanilla sugar
- a few drops of sunflower oil
- an apple
- any fruit you'd like as a topping - I went for one banana


1) To start off, place milk, water, flour, sugar as well as vanilla sugar in a mixing bolw.

2) Then, seperate the eggs - put the egg whites into a sepearte, smaller mixing bowl, while the egg yolks go into the first one.

3) Following that, you will want to whisk the egg whites until stiff.

4) Now you can start to whisk the ingredients in your first mixing bowl for around two minutes so that they appear well combined.
 After that, you add in the stiff egg whites and whisk the whole thing for another minute.

5) To finish off your pancake mixture, you now skin an apple, chop it up into very small dices and mix it into your already prepared mixture.

6) At this point, you're finally ready to actually cook your pancakes!
To do so, turn your stove on medium heath and heat some drops of sunflower oil in a pan. Once the oil appears to be hot, add a small amount of your pancake mixture into the pan.

7) You'll want to check the bottom side of your pancake very frequently to make sure that it turns a nice shade of brown and doesn't burn - once that bottom side is well-done, flip your pancake to fry the upper side of it as well!

8) Once your pancakes are completely done, it's time to add your topping of choice - I went for slices of banana because that's all we had left. (Being an adult and remembering to go grocery shopping is hard.)
I bet these would taste delicious with various kinds of berries or other fruit as well!


Et violà - there you have some semi-healthy pancakes! I know that they're not completely fit for clean-eating or anything, as there's still some sugar in them - but they're definitely a healthier option to your typical nutella filled pancakes or crepes.
Even if you don't want to add any topping to your pancakes, you will still be able to taste the apple you added to your pancake mixture - it adds a nice


Have you developed or found a great recipe recently? If so, please share it with me, I'm always on the lookout for new things to try!
SHARE:

Sunday, October 11, 2015

7 Super Spooky Recipes To Try Out This Halloween | Lifestyle

I don't know about you, but over the past few years, Halloween has become one of my favorite holidays. I think I might even love it equally to my favorite holiday of them all - Christmas.
And we don't even celebrate Halloween all too much here, so I'm not sure where all of this excitment came from originally, but I do know for sure that it is here to stay, and it only grows with every year that passes.

So, as we're well into the wonderful month of October, it's about time to start thinking about Halloween preparations in my eyes - there is no such thing as too early, am I right?
And even though thinking of costume ideas is way too much fun for someone who is kind of entering adulthood, there is something that is even more exciting to me - preparing food for a Halloween party!

Yeah, you heard that right. Spooky finger food - quite literally. 
So, as you do, I headed over to Pinterest for some inspiration, and I stumbled upon so many amazing recipe ideas that I just had to share them with you guys!


1. Candy Corn Caramel Apples

(via howdoesshe)

My tummy rumbled literally the second I found this photo. Caramel apples are one of my favorite fall treats, and these decorated ones definitely set the mood for Halloween.
Also, these aren't caramel apples only - you add candy corns to the caramel to give the apples that extra kick.
I want these in fornt of me. Right now.


2. Zombie Head Cheese

(via not martha)

This cheese dip just looks too amazing to pass up, and it's also really easy to prepare.
All you'll need is a plastic skull, spredable cheese and some coctail onions for the eyes - and without much fuss, you'll be able to display one eyecatcher of a cheese dip!


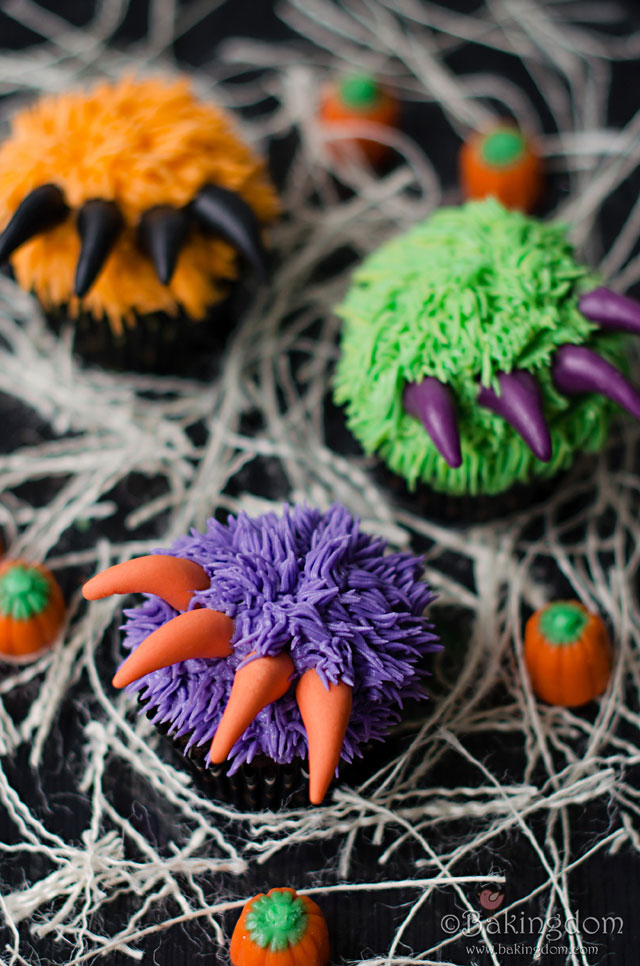
3. Monster Claw Cupcakes

(via bakingdom)

Tell me that these are not the most adorable cupcakes you've ever seen, I dare you.
While these are definitely a little trickier to get right - because oh my god, how do you get the fur to look so god damn real? - with some work and dedication, these will come out looking pretty darn fine.
These are especially perfect for when you're planning a kids' Halloween party!


4. Guacamole Puking Pumpkin


This might not tickle everyone's pickle because it might look a little too real, but it definitely is another creative way to serve some kind of dip.
All you'll need for this is a carved pumpkin, some guacamole and your favorite chips - if you're feeling adventurous, you could even dye them to look more spooky, like the ones in the photo above!


5. Dracula's Dentures


This recipe is totally adorable, and people with a sweet tooth will have almost as much fun prepin' those as they'll have eating them.
This definitely takes baking plain cookies to another levels, but it's also fairly easy to follow - and obviously, will leave you with an awesome result.


6. Nutella Banana Mummy Rolls


This recipe features one of my favorite combinations, bananas and nutella - yes, I sometimes dip my bananas in Nutella, okay? Ssssh, nothing wrong with that.
And it's also totally okay to eat a few of them since they contain fruit. So healthy.
The mummy rolls also look super cute once finished up with the candy eyes, and I can just imagine how delightful biting into these must be. Mhmmmm.


7. Halloween Party Cake


With a recipe that's as easy to follow as this one, even dummies like me can manage to bring out the freaking coolest cake ever at the next Halloween party they host.
Food coloring allows you to give this cake its mega bright appearance - and even though it might look a tiny bit poisonous, it'll taste absolutely delicious!


Do you have any favorite Halloween recipes that you love to whack out during this time of the year?

SHARE:

Wednesday, August 19, 2015

A Fool-Proof Taco Recipe | Lifestyle

Ever since moving out earlier this year, I've had to cook a lot more than I used to do, which led to me living off toast and cereal for weeks because I came to relize that, oh my god, I hardly know how to cook.

I got tired of making the same three or four meals that I know how to cook over and over all the time - and when I invited friends over to my new place for the first time, I headed over to Pinterest, hoping to find some new recipes because I was seriously lacking inspiration and quite honestly on the verge of a mini breakdown.

I stumbled upon this recipe for tacos, which looked easy enough, yet sounded pretty darn delicious.
And it definitely was! The instructions were really easy to follow, so us girls had no trouble prepearing the tacos. And if a bunch of teens can cook up this dish, I'm pretty sure you should be able to, too!

As this has easily turned into my favorite dish - and it's totally healthy as well because there's vegetables in it, right? - I decided to share it with you guys.

Ingredients:

- 2 lbs ground beef (alternatively chicken/turkey)

- 1 onion, diced

- 1 can tomato sauce

- 1 can refried beans 

- 2 cups shredded cheese

- 18-20 hard taco shells


Optinal Ingredients:

- Lettuce (shredded)

- Tomato (diced)

- Pepper (diced)

- Salsa

- Sour Cream

- Guacamole


Homemade Taco Seasoning:

- 1 tabelspoon chilli powder

- 1/4 tabelspoon garlic powder

- 1/4 tabelspoon onion powder

- 1/4 tabelspoon dried oregano

- 1/2 teaspoon paprika

- 1 teaspoon pepper

- 1 teaspoon salt


Preheat the oven to 200 degrees celsius.
In a large skillet brown the meat of your choice and onion over medium-high heat. Drain of any excess liquid.
Return to the pan, add your refired beans as well as the tomato sauce and homemade taco seasoning.
Mix well and cook for a few minutes until the mixture doesn't seem runny anymore.

Spoon the meat mixture into the taco shells and add all the optional ingredients you would like to include in your taco, like lettuce or tomatoes.
Place the tacos in a baking dish, standing up. Then sprincle the tacos with the shredded cheese.

Place into the ofen and bake at 200 degrees for 10 to 15 minutes or until the cheese has melted and the tacos are heated through.


What is your absolute favorite dish?


SHARE:
Blogger Template Created by pipdig